Sunday, March 10, 2013

DIY Pano Head


I had found a few online designs of camera mounts for shooting panoramas. There are of course lots of commercial options available. I don't want to buy one - as I kind of feel they are very expensive (maybe I'll change my mind after I see how my rig does). So I tried to build one today.

I decided to make a pano head that worked with my 35mm prime lens, so this pano head is only designed to work with that combination - my Nikon D90 and my AF-S 35mm F1.8G DX lens.
Several reasons pushed me this way;
1) It's a prime, I can't mess up the zoom settings
2) It's likely the sharpest lens I own
3) At F1.8 I have much more F-stop if I'm shooting in the dark
4) As a very small lens it kept the whole pano head rather small (easier to carry out to where I might use it)

I used this design as a VERY loose template of where to start: http://xray.uky.edu/people/parkin/panohead/panohead.html
Then I used some of the measurements on this website to help me set up my rig: http://wiki.panotools.org/Entrance_Pupil_Database


I don't have any photos of the device itself, I hope to be able to shoot some more with it tomorrow and take some photos of it with my camera in place. For now, here is the first test of the very narrow space that is the workshop in my basement. This space is not very deep, I'm not very far from the bench itself, probably ~18 inches or so.


20 Images, all shot 0.4 sec @ F8 ISO 400 (I shot this test on jpg - small and basic file sizes for speed of processing), I also used my remote trigger.
In lightroom I dropped the highlights and bumped the shadows (a lot - for fun) and then added some clarity, same settings to all the photos.
Then I dumped them into Photoshop Elements 9 in the Photomerge:Panorama feature, everything on AUTO.

Overall, I'm relatively pleased with things so far. Of note, the handle on the vice IS bent and the boards that make up the front surface of the bench ARE a bit warped and wobbly... so perhaps not the best test.


Another attempt... more of a trial outside, found some issues, fixed them, but this is the first outdoor pano. This is a full 360 degrees of my backyard.
 
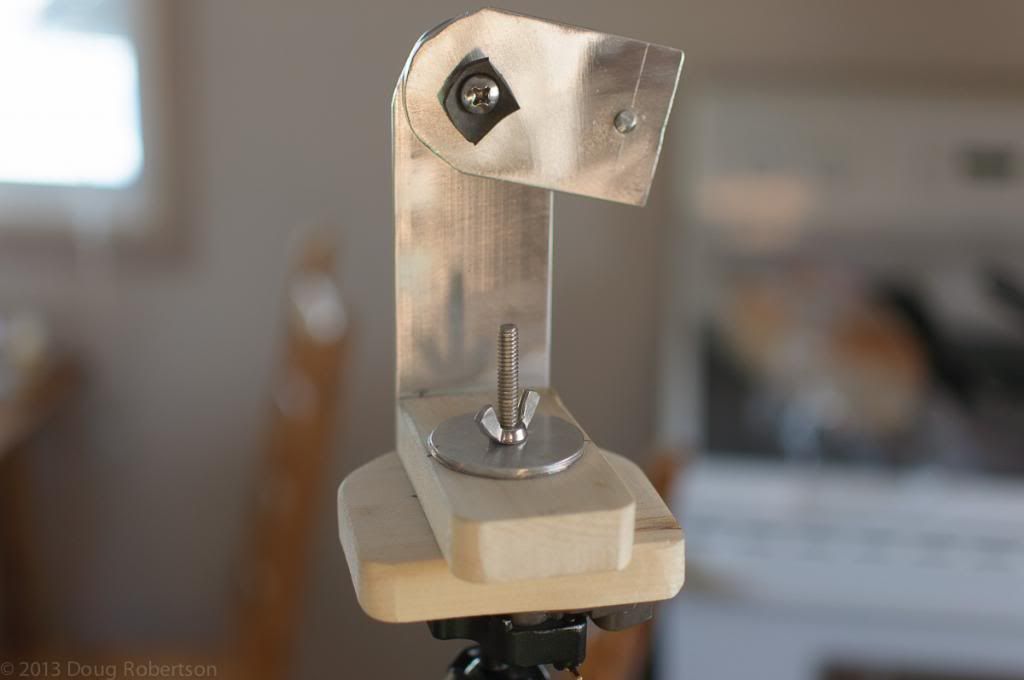
Some photos of the unit itself.  
1) On the tripod, levelling the head.  
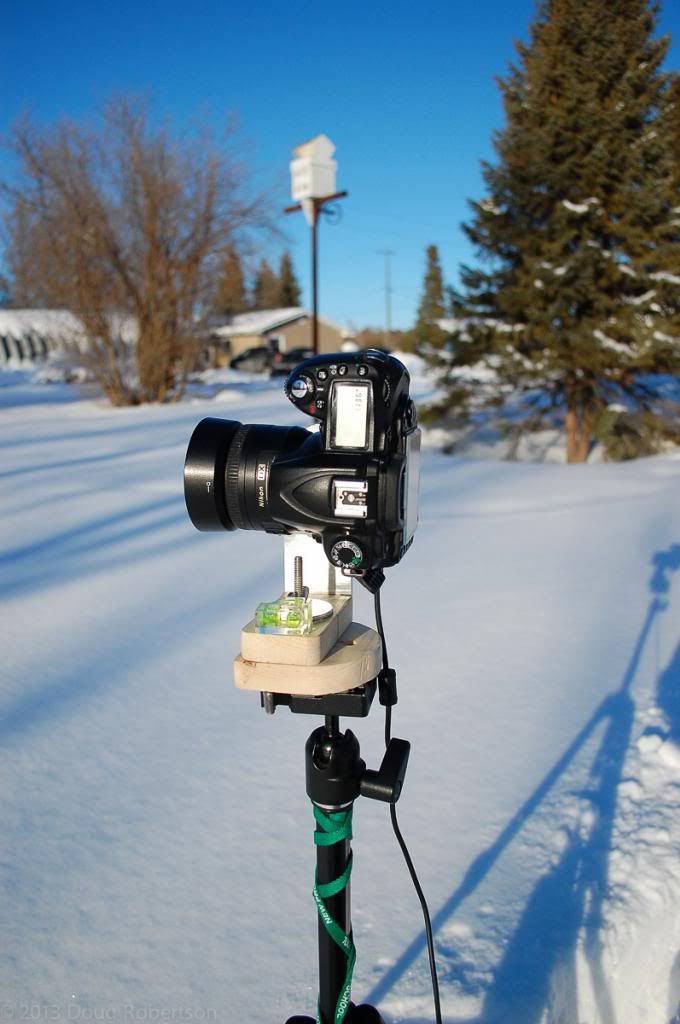
2) View of the front of the camera  
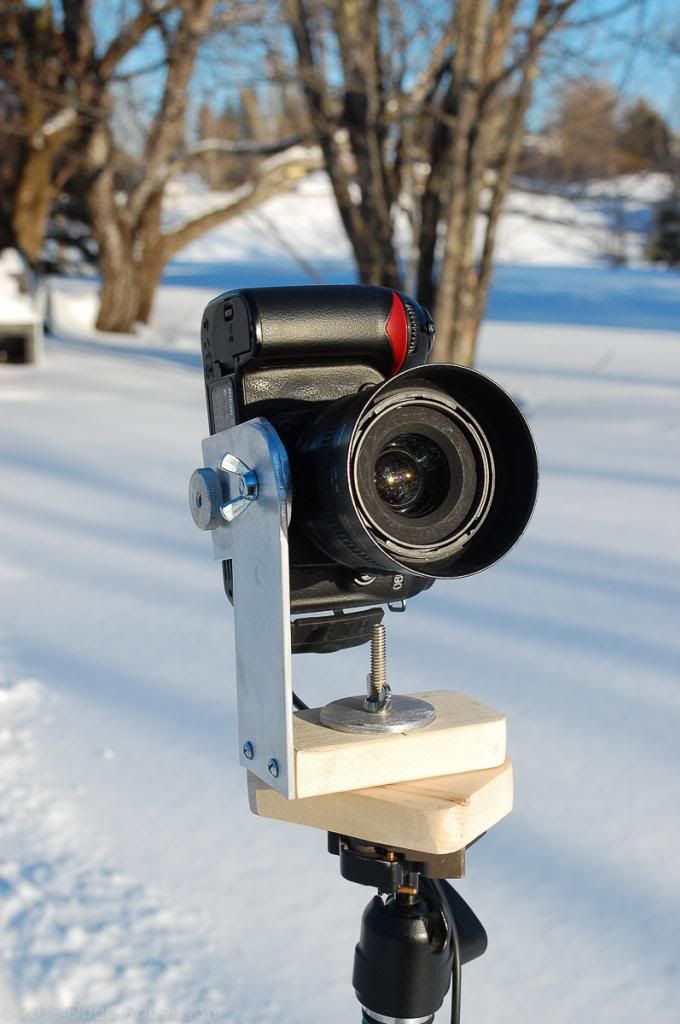

3) Topside of camera  
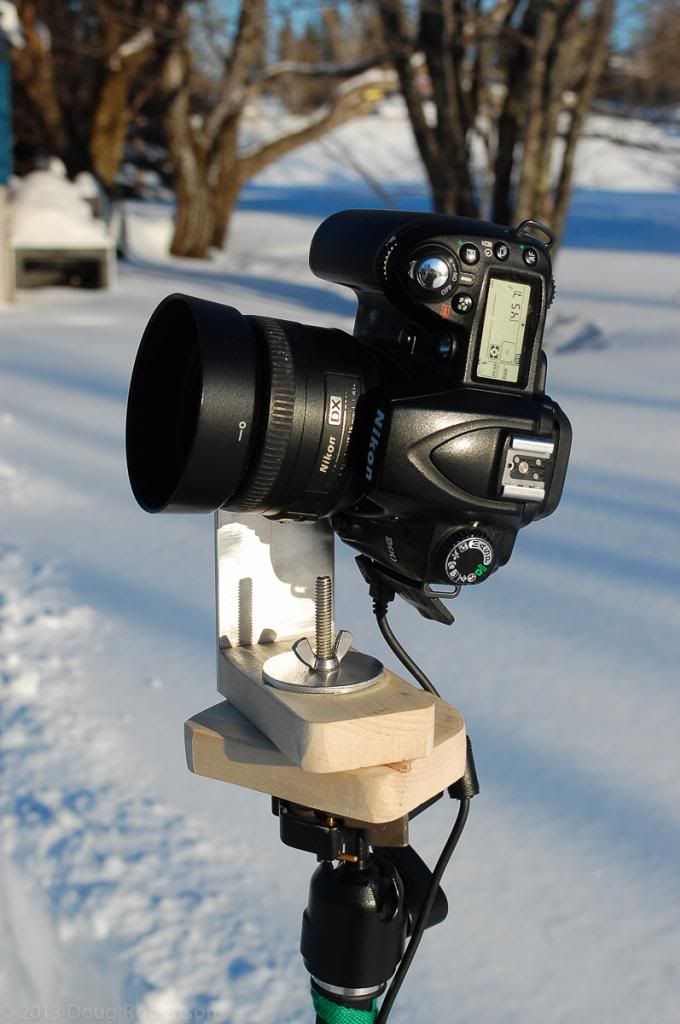

4) Pano head with the camera missing

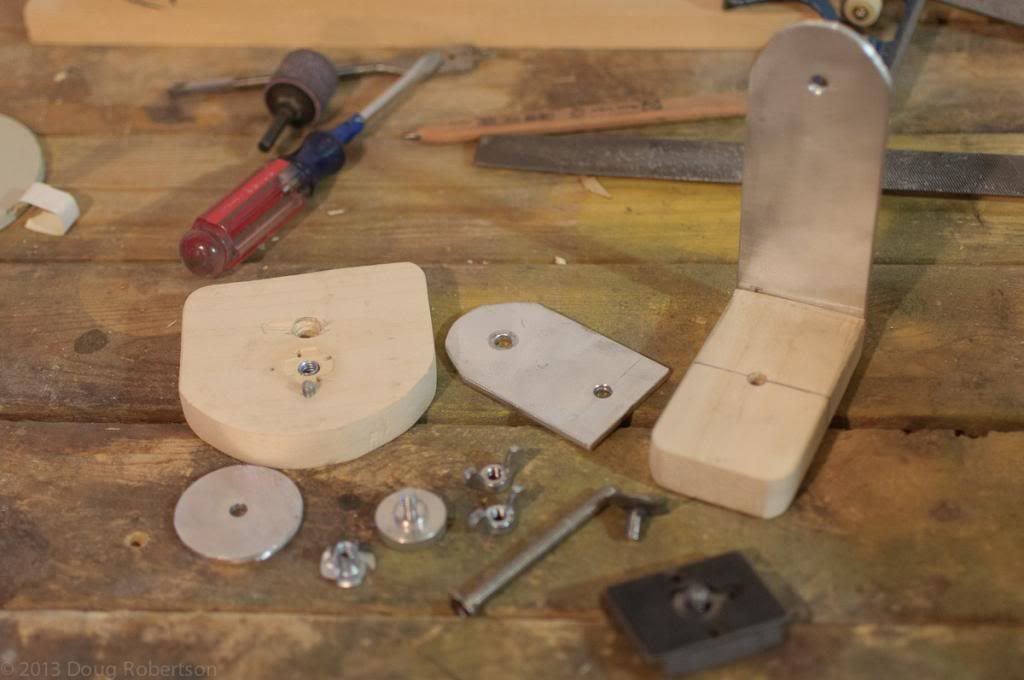
 5) Disassembled on my workbench. Base plate (note the guide pin for the tripod quick release plate), camera arm, pivot & support arm, large washer and other hardware, quick-release plate  
 

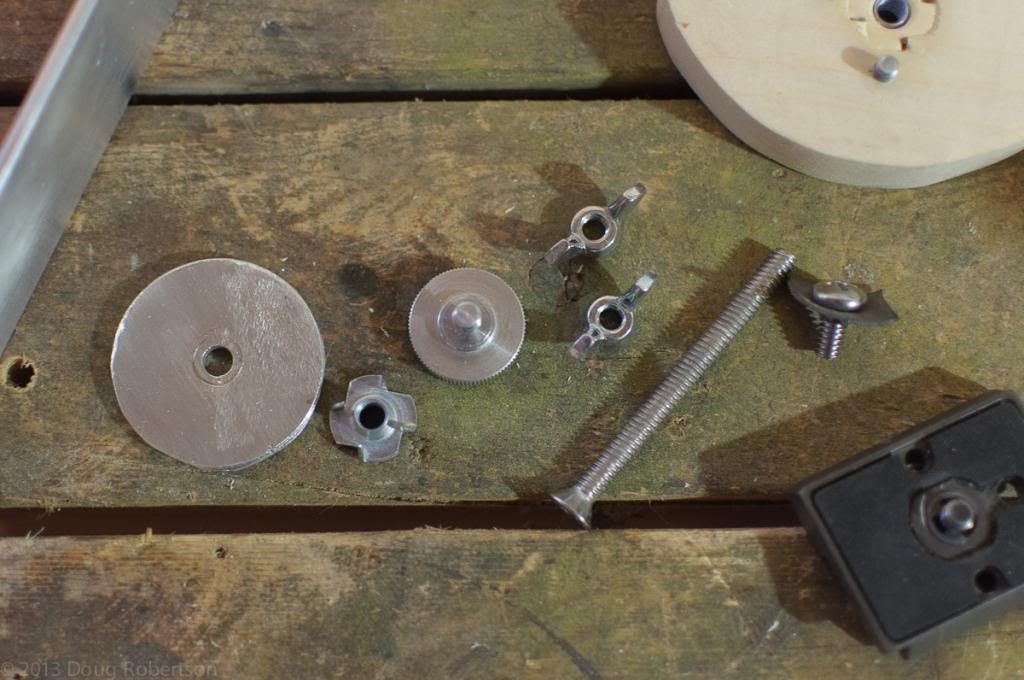
6) Hardware (L-R): Purpose made washer, example of the tee nuts used, post used to secure camera, 2 wing nuts, large machine bolt for pivot, small machine bolt with a bit of rubber that holds the camera arm, tripod baseplate.  

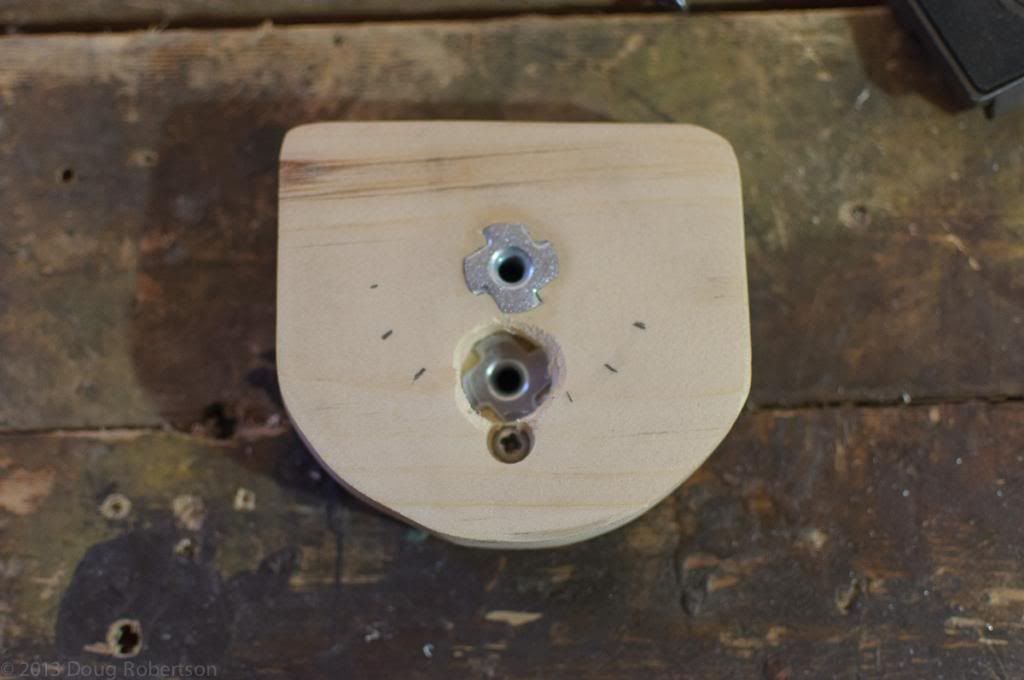
7) Baseplate,the three holes in the baseplate, top one holds the machine bolt that the unit pivots on, the middle tee nut fastens the tripod quick release, and the bottom one goes through the baseplate to provide a guide pin for the baseplate (this ensures the baseplate and the quick release plate don't start twisting apart).  
Monday, September 17, 2012

Saturday, September 15, 2012

It has begun...

Olivia started dance class.
You have not seen excitement until you've seen a 5 year old little girl who has been dreaming of becoming a ballerina hear news that she's has dance class that evening.


Monday, September 10, 2012

Friday, September 7, 2012

Thursday, April 12, 2012

Some before and after practice

I've been working on trying to get some practice on my photoshop skills.
I do not use Photoshop (or in my case Photoshop Elements) very often at all. I use Lightroom for the VAST majority of my editing. Version 4 of Lightroom is really amazing for editing actually.

These photos however, needed more then what Lightroom can do.

NOTE: You should be able to click any of these and make them larger.

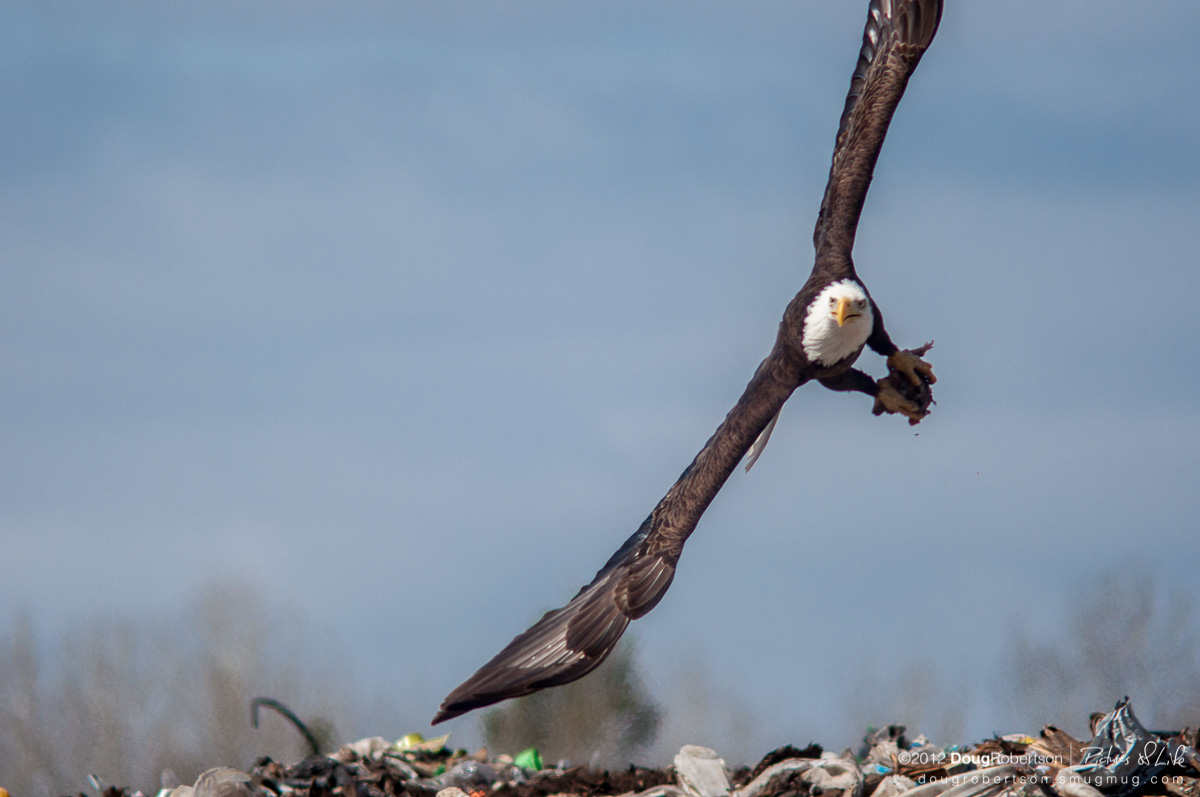
So in this first one I liked the eagle, but the smoke stack and the blurry crow didn't work for me.

Before

After

This one, I quite like the body position and the sense of action with the Eagle carry a clump of garbage. Unfortunately, I chopped the wing off.  So I extended the canvas above the bird. Then I copied the bottom wing tip. Flipped it, enlarged it so it fit, then rotated it in place.  I cloned out part of the garbage heap that I found distracting.  Then I burned (darkened) the heap.  
The hard part of this one was the sky. I found smoothing out the sky was tough. I am sure there is an easier way to do it, but I will have to learn it.
I also decided to try the square crop.

Before

After

So, what's the take away for you? Try playing with stuff on your computer! This is what I did.

Thanks for reading!
Cheers.

Friday, April 6, 2012

Foggy Wallpaper


I made this my desktop wallpaper. You can have it too if you like, full size it's 1440x900 pixels.
It fits my computer well.

Cheers!

Tuesday, April 3, 2012

So, you want to get into photography?

Camera Bag Geekiness 2011
Click Through to see Labels on the Flickr Page
So, you want to get into photography?

This post is about gear.

People ask me regularly about what DSLR (digital single lens reflex) camera they should buy.

 That's not an easy thing to answer. I often tell people that you are buying into a system. When you buy a particular brand of camera you enter into their little world of lenses and other accessories. Certainly there are accessories and devices that you get that are far beyond your camera manufacturer.

I chose Nikon gear. I had a Nikon film camera and used some of my film gear when I was starting with digital. My Dad has used Nikon cameras my whole life, and actively shoots with a Nikon DSLR. For me it made sense to shoot Nikon because of the gear I already had, and that I had access to knowledge from someone close to me.

Now this post is NOT meant to scare you away from photography. The beautiful thing about photography is that you don't have to get everything right away. You can start shooting with what you have already. Your mobile phone likely has a camera, use it!

That being said, as you begin to develop your skills there are other things to consider with regards to gear. There's an old saying about photography equipment: You can have it fast, sharp or cheap, pick any two (fast refers to how much light you are able to record with a given piece of equipment). Everything in photography can be perceived as a compromise, you choose one thing and it will  determine other things. For many of us - budget is a concern. The type of photography you want to do will influence your buying decisions. For example, wildlife photography can involve some very expensive lenses. What you want to do with the photos will make a difference too, shooting for large prints is different then shooting for Facebook.

 I wanted to make a list about some of the things you *might* eventually might buy if you are into photography. I don't have all the things on this list by any stretch of the imagination, but I have thought about getting them. It's good to consider the costs of a hobby and being smart about where you are putting your money to get the most value you can for your money.


What goes into a camera hobby.
  • Camera body(ies)
  • battery grip
  • Lenses
    • prime
    • wide 
    • 'normal'
    • telephoto
    • zoom
  • Lens accessories
    • macro tubes
    • teleconverters
  • Flash(es)
    • Flash modifiers
    • Reflectors
    • Light stands
  • Tripod 
    • legs 
    • head (on cheaper tripods this is attached to the legs)
    • Quick Release system
    • focus rail (macro)
    • nodal point system (panorama)
  • Memory Card (s)
  • camera bag (s)
    • small for day trips
    • big for bringing everything
  • extra batteries
  • remote
  • filters
    • protective(maybe not)
    • neutral density
    • polarizing
  • after market strap
  • flash triggers
  • oldnew camera selfportrait
    What I learned a lot of my photography with...
    • radio
    • optical
  • lens cleaning equipment
  • computer
    • data backup solution
      • local backup
      • offsite backup
    • software
      • Lightroom
      • Photoshop (Elements)
      • software for backing up
    • Website memberships to share
      • Flickr
      • Smugmug
      • Blogger
      • etcetera...
    • bigger monitor(s)
    • monitor calibration tool
    • tablet input device (Like a Wacom)
    • Memory Card Reader
    • how do you deal with data when you are away from your desk?
  • training
    • books
    • online
    • workshops
    • clubs
  • travel


Tuesday, September 20, 2011

Eagle before and After- Trying to learn

Trying to learn a little about photo editing in Photoshop Elements. Here's a before and after photo from a trip to the dump the other day. Before eagle before edit After eagle after edit
I'll try to remember what I did.
Started in lightroom, crop, exposure, fill light, brightness, blacks, contrast adjustments, did a brush adjustment on the eye - then opened image in Elements delete background (all but the bird and rock) clean up the beak (clone tool) clean up the remaining branches from the foreground bushes (clone tool) desaturated the Chromatic Aberration on the tail feathers with an adjustment layer Sharpened. I share this, because I know some of you are far better at this than I am. Hit me with what you would've done. Critique as much as you want, composition, camera settings, you can even tell me I should've used a Canon camera (although I'll likely ignore that comment until you drop such a camera and lenses in a box on my doorstep).


Friday, July 1, 2011

A photo from our almost empty house

We're not in Dryden anymore. We're in limbo. We have no home and no job and we are on vacation.

Here is a photo from just before we moved. Part way through the 3 or 4 days of work to get stuff in storage and sorted out... kids having fun. This image made me laugh out loud when I saw them all waving - arms stuck out of a wall....

(notice the healthy supper in the one hand.)
peek a boo