
I had found a few online designs of camera mounts for shooting panoramas. There are of course lots of commercial options available. I don't want to buy one - as I kind of feel they are very expensive (maybe I'll change my mind after I see how my rig does). So I tried to build one today.
I decided to make a pano head that worked with my 35mm prime lens, so this pano head is only designed to work with that combination - my Nikon D90 and my AF-S 35mm F1.8G DX lens.
Several reasons pushed me this way;
1) It's a prime, I can't mess up the zoom settings
2) It's likely the sharpest lens I own
3) At F1.8 I have much more F-stop if I'm shooting in the dark
4) As a very small lens it kept the whole pano head rather small (easier to carry out to where I might use it)
I used this design as a VERY loose template of where to start: http://xray.uky.edu/people/parkin/panohead/panohead.html
Then I used some of the measurements on this website to help me set up my rig: http://wiki.panotools.org/Entrance_Pupil_Database
I don't have any photos of the device itself, I hope to be able to shoot some more with it tomorrow and take some photos of it with my camera in place. For now, here is the first test of the very narrow space that is the workshop in my basement. This space is not very deep, I'm not very far from the bench itself, probably ~18 inches or so.

20 Images, all shot 0.4 sec @ F8 ISO 400 (I shot this test on jpg - small and basic file sizes for speed of processing), I also used my remote trigger.
In lightroom I dropped the highlights and bumped the shadows (a lot - for fun) and then added some clarity, same settings to all the photos.
Then I dumped them into Photoshop Elements 9 in the Photomerge:Panorama feature, everything on AUTO.
Overall, I'm relatively pleased with things so far. Of note, the handle on the vice IS bent and the boards that make up the front surface of the bench ARE a bit warped and wobbly... so perhaps not the best test.
Another attempt... more of a trial outside, found some issues, fixed them, but this is the first outdoor pano. This is a full 360 degrees of my backyard.

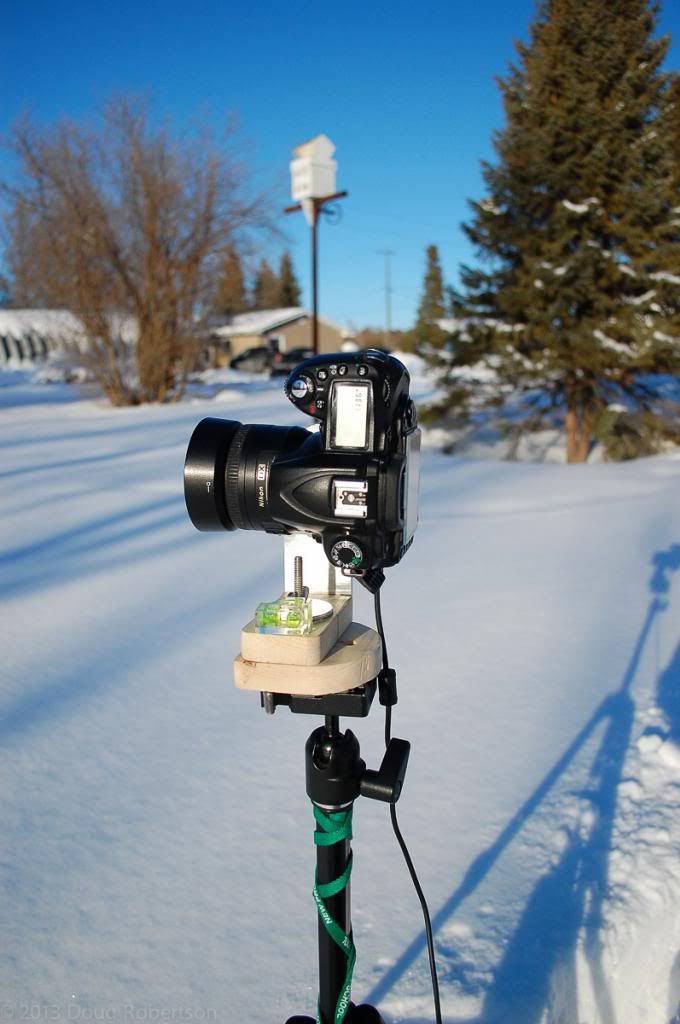
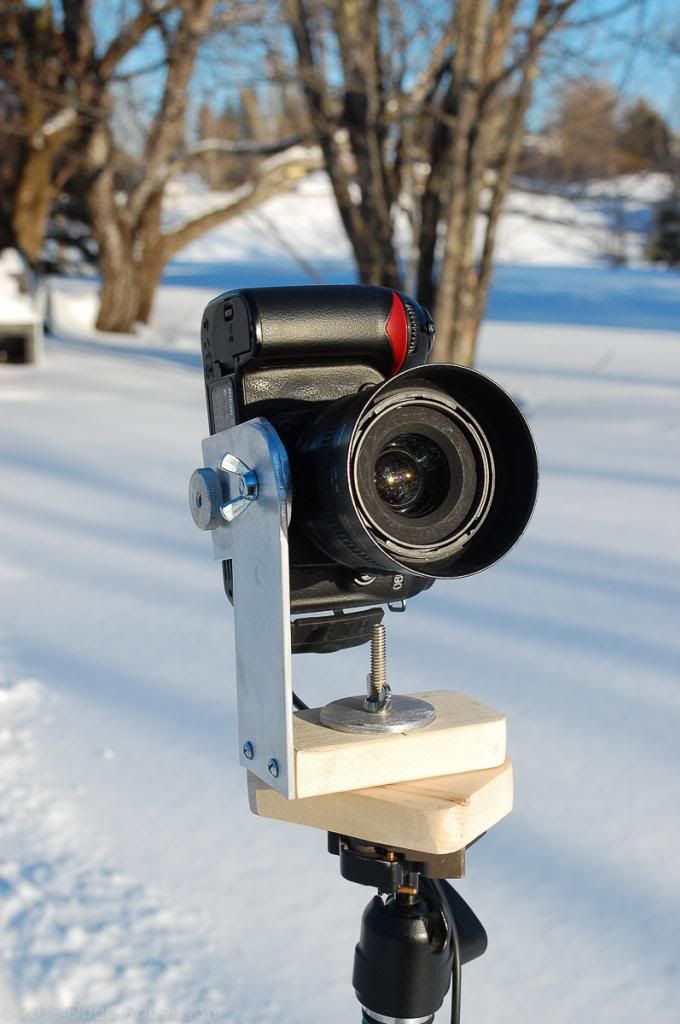
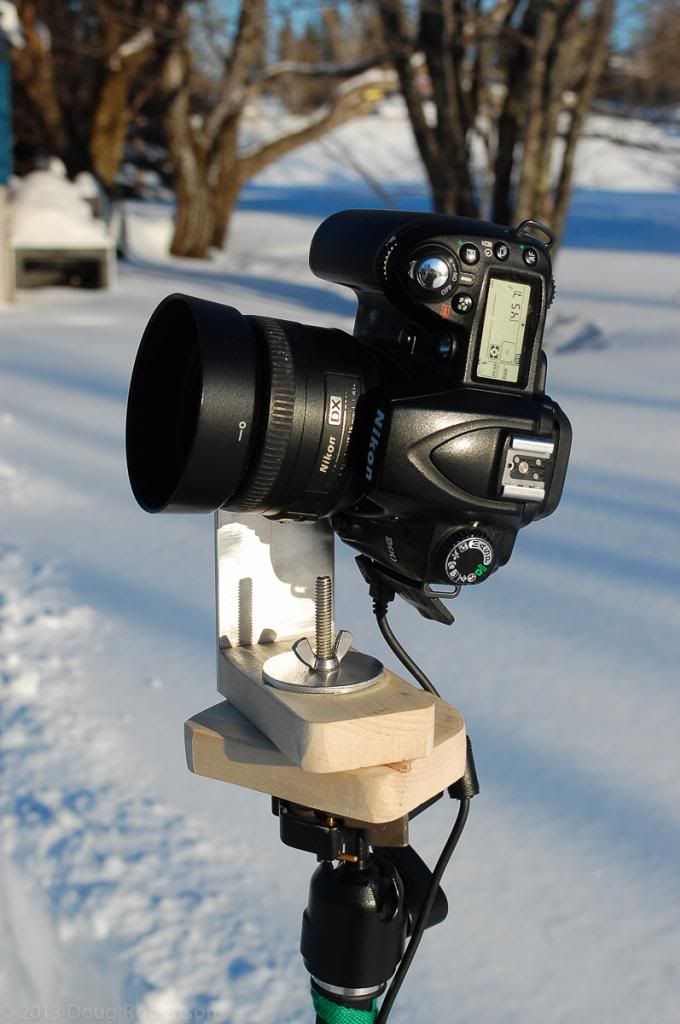
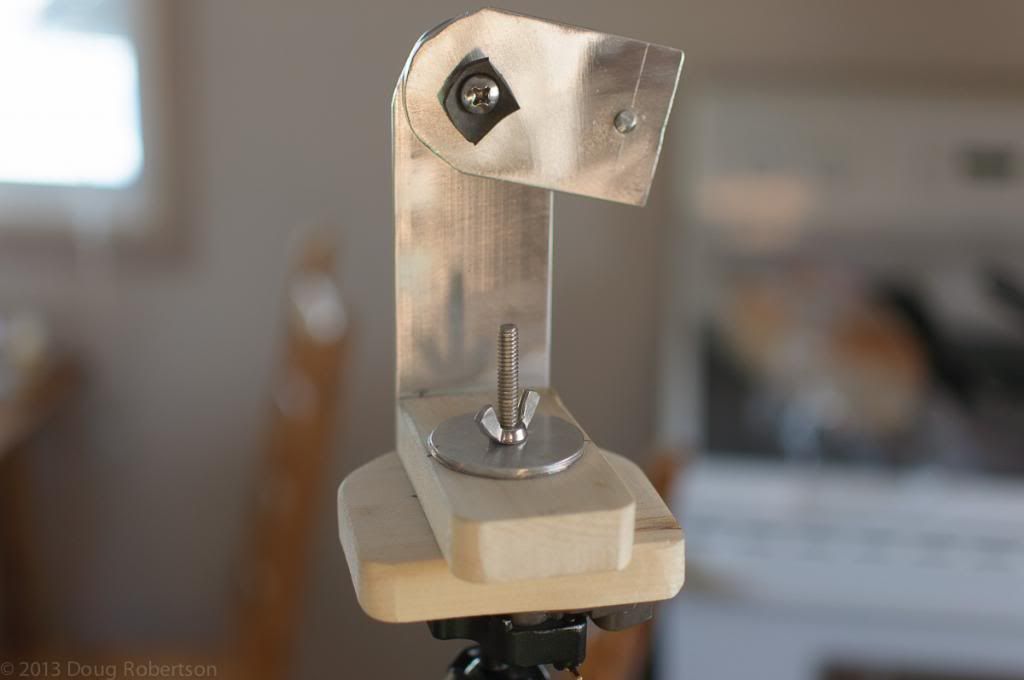
Some photos of the unit itself.
1) On the tripod, levelling the head.
2) View of the front of the camera
3) Topside of camera
4) Pano head with the camera missing
5) Disassembled on my workbench. Base plate (note the guide pin for the tripod quick release plate), camera arm, pivot & support arm, large washer and other hardware, quick-release plate
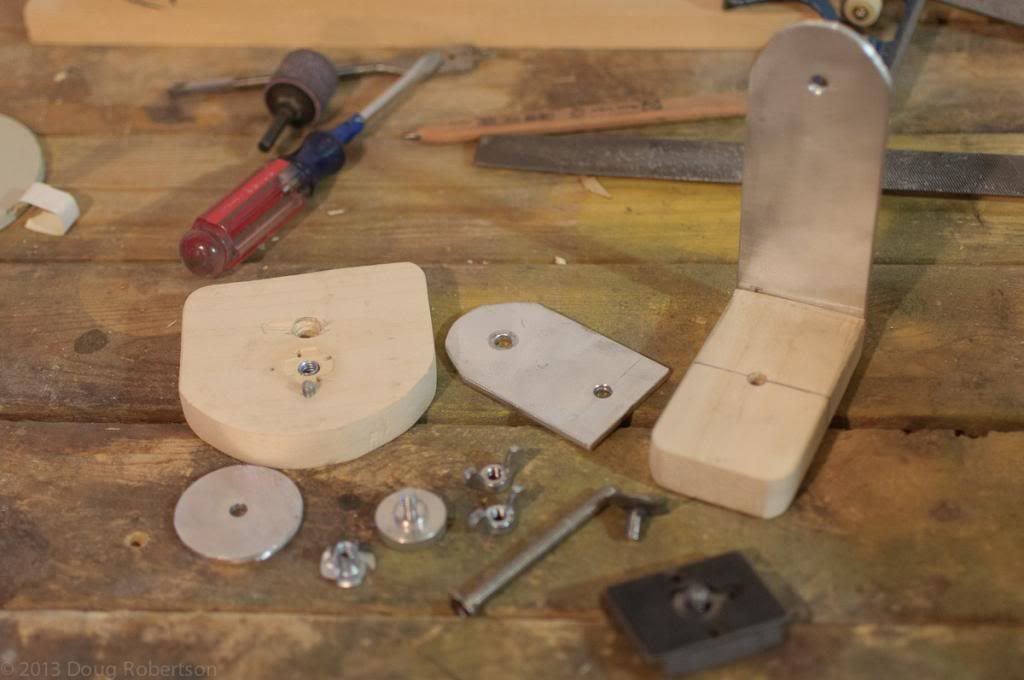
6) Hardware (L-R): Purpose made washer, example of the tee nuts used, post used to secure camera, 2 wing nuts, large machine bolt for pivot, small machine bolt with a bit of rubber that holds the camera arm, tripod baseplate.
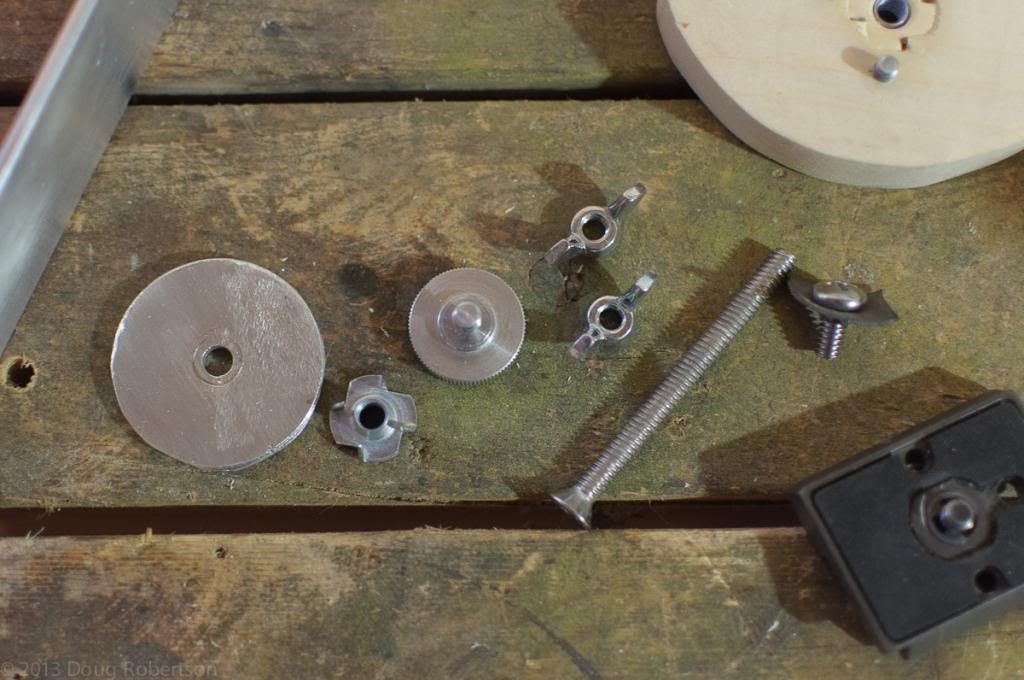
7) Baseplate,the three holes in the baseplate, top one holds the machine bolt that the unit pivots on, the middle tee nut fastens the tripod quick release, and the bottom one goes through the baseplate to provide a guide pin for the baseplate (this ensures the baseplate and the quick release plate don't start twisting apart).
